DIY Holiday Resin Ornament Kit – Arctic Snowy Night (All-in-One)
Imagine this: it’s a quiet winter evening. Outside — cold air and city lights. Inside — warm tea, soft music, and one simple plan: to make something with your hands that looks like it came from a boutique Christmas market.
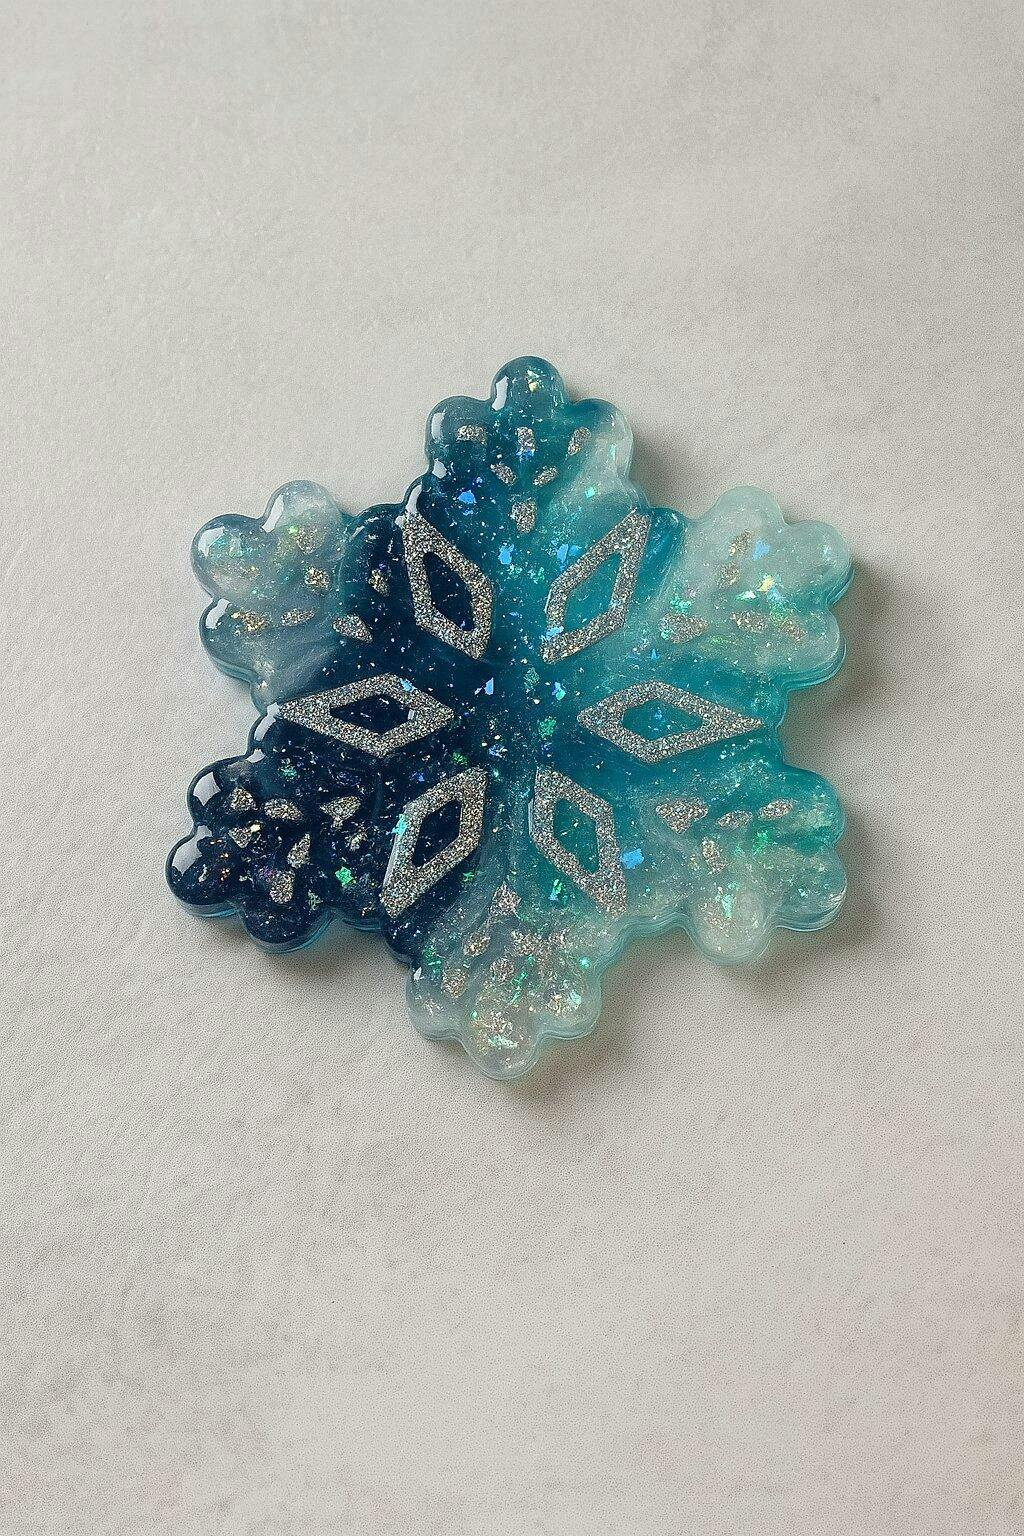
That’s exactly why we created the Christmas Epoxy Resin Art Kit — a curated set that captures the mood of icy winter nights: frosty blues, gentle snow-white swirls, metallic highlights, and a clean sparkle that looks elegant (not messy).
 The vibe + the finish you’re aiming for — “icy glow” with depth
✨ This Christmas kit includes (everything is compatible)
- Crystal Epoxy Resin 0.9 kg — low viscosity, crystal clear, ideal for detailed molds
- Pigment Pastes: Dark Azure, White, Turquoise Blue
- Metallic Pigment Powders: Metallic Silver, Metallic Mint
- Effect add-ons: Polyester Glitter Silver, 0.5 mm, 5 g
- Silicone Mold – Christmas Ornaments (9 designs, 8.5 cm)
📖 A tiny story (and why this set feels “easy”)
Most beginners don’t fail because of creativity — they fail because of the combo: the wrong resin, pigments that don’t behave, bubbles, or a mold that ruins the details.
This kit removes the guesswork. Everything here is tested to work together, so you can focus on the relaxing part: mixing color, pouring slowly, and watching the “winter night” appear.
🧤 Before you start (60 seconds)
- Room: 22–24°C for the most predictable result
- Safety: gloves + ventilation
- Surface: flat and stable (so the ornament cures evenly)
🛠 How to get that “icy” result: step by step
Step 1 — Mix the base (2–3 minutes)
Measure and mix the resin components A + B using A:B = 2:1 by weight. Stir slowly for 2–3 minutes (slow mixing = fewer bubbles).
Step 2 — Let it “breathe” (1–2 minutes)
Let the mixture rest for 1–2 minutes so micro-bubbles can rise to the surface.
Step 3 — Create frosty shades (1–2 minutes)
Split the resin into 2–3 small cups:
- one cup: a touch of White for soft “snow”
- second cup: Dark Azure for deep winter-night tones
- optional third cup: Turquoise Blue for icy glow
For a premium finish, add a pinch of Metallic Silver or Metallic Mint — it catches holiday lights beautifully.

 The secret to “wow”: build color first, then add metallic + sparkle
Step 4 — Add sparkle (10 seconds)
Add Polyester Glitter Silver (0.5 mm) to one cup, or sprinkle a tiny amount on the top layer inside the mold for a “snow dust” effect.
Step 5 — Pour into the mold (2–4 minutes)
Pour slowly. For a gradient: start with your base shade, then add the second color in a thin stream and gently guide transitions with a stick.
- If needed: gently warm the surface (hairdryer from a distance) to pop bubbles
- Once poured: don’t move the mold — let the pattern settle naturally

 9 designs in one mold — make a mini collection in one cozy evening
Step 6 — Cure (24 hours)
Leave the mold undisturbed for 24 hours on a flat surface. Don’t move it during curing — that’s how you get a smooth, glass-like finish.
Step 7 — Demold & enjoy (30 seconds)
Gently remove your ornament — and watch how frosty blues + metallic shimmer create that clean holiday glow ✨

💎 What you’ll love about the final look
- Frosty depth without “muddy” color
- Elegant metallic highlights that catch Christmas lights
- A clean sparkle that feels refined (not overdone)
- Ornaments that look giftable — and proudly handmade
Ready to create your own winter ornaments?
Order the kit and turn one evening into a small holiday tradition ✨